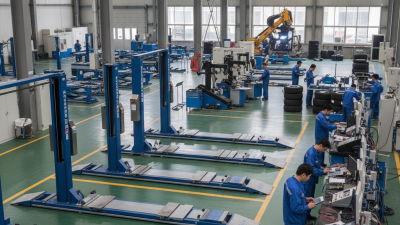
Welcome to our websites!

How to Choose Garage Equipment in 2026?

Choosing Garage Equipment in 2026 is less about buying the newest machine and more about matching tools to real jobs. A busy repair shop may need a certified vehicle lift, tire changer, and reliable air compressor. A home garage might benefit more from a sturdy workbench, quality hand tools, and better lighting. Start with the vehicles you service, the work you perform, and the space you can safely use. Measure ceiling height, door clearance, floor area, and electrical capacity before comparing products. Small details matter. A lift that fits on paper may leave too little room to open a vehicle door.

Check manufacturer specifications, load ratings, installation requirements, and maintenance guidance. For lifting equipment, confirm that the model suits your floor and vehicle types, and use qualified installation support where needed. Compare warranty terms and access to replacement parts, not just purchase prices. Digital diagnostics and connected features may be useful, but they are not automatically worth the extra cost. A simpler machine can be the better choice when controls are clear and service is available nearby. That matters.

Even experienced buyers can misjudge how often a tool will be used. I would question any recommendation based only on a feature list; workload and technician skill change the answer. Reliable advice should be grounded in product documentation, practical needs, and safe operating procedures. This guide will help readers compare essential equipment, assess newer options, and build a garage setup that fits their budget and work. No checklist removes every doubt. The goal is a considered choice, not a perfect one.
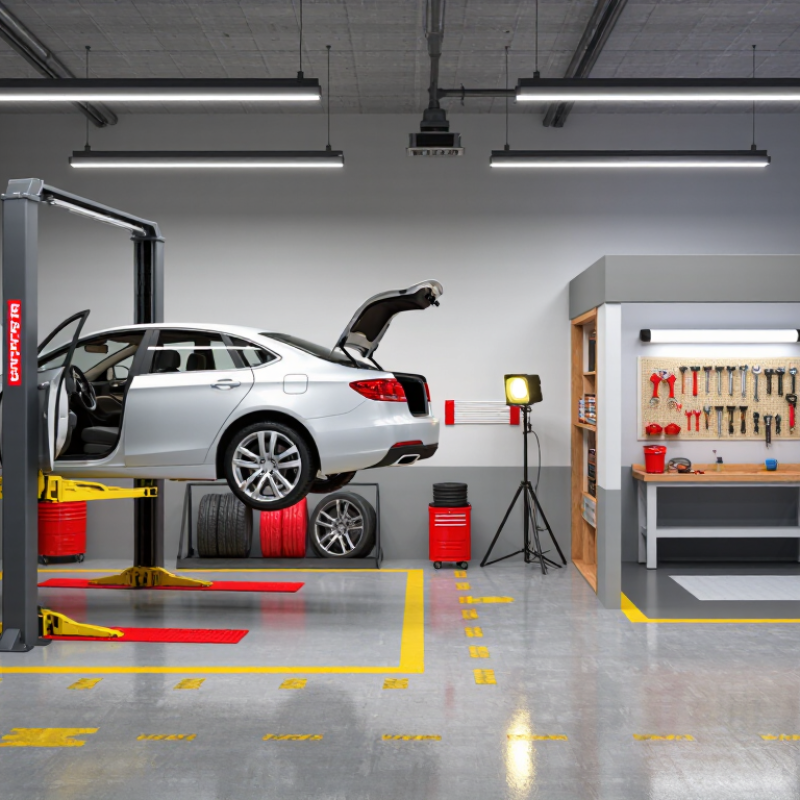
How to Choose Garage Equipment in 2026?

Define the Garage’s Purpose and Expected Workload

A garage should be equipped for the work it actually performs, not for every job it might someday handle. A home workshop focused on oil changes, brake checks, and seasonal tire swaps needs clear floor space, a stable jack, secure stands, and well-lit storage. A busy repair bay may need higher-capacity lifting equipment, compressed air, and dedicated diagnostic tools. Match each item to the vehicle sizes and tasks you expect to handle.

Tips: Track common jobs for a month. Note vehicle types, time spent, and tools you reach for repeatedly. Leave room for safe movement around raised vehicles.

Workload matters as much as purpose. Estimate how many vehicles you service weekly and how long equipment may remain in use. A tool used once a month can often be shared or stored away; daily-use equipment should be easy to access and built for repeated work. Check load ratings, maintenance needs, and available power before purchasing. Follow the equipment maker’s setup instructions, and never rely on a jack alone to support a vehicle. Measure doorways and ceiling height, too. I once overlooked a low beam; moving a planned lift later would have been expensive. Revisit your list as jobs change. The first estimate may be wrong, and that is useful to notice.

Measure Available Space and Check Utility Requirements

Before comparing lifts, compressors, workbenches, or storage, measure the garage as it actually works. Record wall-to-wall width, ceiling height, door-track clearance, and room to open vehicle doors. Mark each proposed footprint with masking tape, then walk around it carrying a tool case. It can feel cramped. Leave space for safe access, service panels, and long items such as tires. Measure around posts, steps, and cabinets, too. My first sketch often looks generous; the taped outline is less forgiving.

Check utilities at the exact equipment location, not just somewhere in the garage. Note outlet voltage, circuit capacity, outlet placement, lighting, ventilation, and floor condition. Motorized or heated equipment may need a dedicated circuit. Check its specifications, and ask a qualified electrician to assess uncertain wiring. Avoid treating an extension cord as a permanent solution. For air tools, compare compressor output with the tools’ stated air demand.

A concrete floor may still slope or contain cracks, so inspect it before anchoring heavy equipment. Check the planned position against nearby drains and low ceilings, especially where a lift or tall storage unit may sit. Write down measurements and utility limits before shopping. One detail is easy to miss: a machine may fit on paper but block access to a panel or garage door.

How to Choose Garage Equipment in 2026? — Measure Available Space and Check Utility Requirements

Use these typical planning allowances to compare equipment and organize a garage layout. Actual dimensions and utility needs vary by model and installation; confirm the equipment manual and local building and electrical requirements before purchase.

Equipment Typical space to plan for Utility requirements to check Measurement and layout checklist
Two-post vehicle lift Allow roughly 12 × 24 ft (3.7 × 7.3 m) for a working bay as an initial layout estimate. Many installations also need about 11–12 ft (3.4–3.7 m) of clear ceiling height, depending on vehicle and lift. Power supply varies by lift and motor; verify voltage, phase, amperage, and circuit requirements from the installation manual. The lift’s required concrete thickness and strength are model-specific. Measure the vehicle bay, ceiling height, door tracks, lights, and overhead obstructions. Check vehicle height with the hood or hatch open, lift-arm swing, post location, and clear access around both sides.
Scissor lift Reserve the lift’s full platform footprint plus room to approach, position, and walk around the vehicle. Surface-mounted and in-ground designs have different space and installation needs. Confirm the model’s electrical supply and whether it requires compressed air or hydraulic connections. In-ground units may require excavation and drainage provisions. Check platform length and width against the vehicles you service. Account for ramp extension, door opening, lift travel, floor slope, and any recessed installation depth.
Tire changer Plan for the machine footprint plus operator space and room to handle a wheel safely; a working zone around 6 × 8 ft (1.8 × 2.4 m) is a practical starting point. Many models use compressed air, commonly supplied around 90–120 psi (6.2–8.3 bar); check the required pressure and air consumption. Verify voltage and outlet type for the selected model. Measure the machine, wheel-handling route, and distance to the balancer. Keep the air hose and power cable clear of walkways and vehicle paths.
Wheel balancer Allow room for the unit, the wheel to be mounted, and safe operator access. A working zone around 5 × 7 ft (1.5 × 2.1 m) is a useful initial estimate. Check the nameplate for voltage, phase, and circuit requirements. Some models also need compressed air; others do not. Place near the tire changer without blocking work areas. Confirm adequate clearance for the largest wheel and for opening any protective hood.
Air compressor and receiver Reserve floor space for the compressor, receiver tank, and service access. Allow extra room for ventilation, cooling, and maintenance according to the manual. Match compressor output and pressure to the combined demand of connected tools. Confirm voltage, circuit capacity, air-line size, and any drainage or condensate-management needs. Locate it where noise and heat are manageable. Measure the delivery route for air piping and check that the location allows safe access to drains, filters, and controls.
Workbench and tool storage Measure the bench length and depth, then preserve a clear standing and working area in front. Wall-mounted storage can reduce occupied floor space. Plan appropriately rated outlets for chargers and tools. Check whether task lighting or dedicated circuits are needed for the intended equipment. Mark cabinet doors and drawers at full extension. Keep storage clear of vehicle doors, emergency exits, electrical panels, and lift posts.
Diagnostic scanner and charging station Usually requires little fixed floor space; allow a small bench or cart area and a safe route to the vehicle. Check charging or power-adapter requirements and provide a suitable outlet. Follow the vehicle and tool instructions when using battery-support equipment. Position the station within practical cable reach while keeping leads away from tires, moving parts, and walkways. Consider reliable network coverage if the tool needs it.
Before ordering: Measure the clear interior dimensions—not just the building’s outside dimensions—and record door openings, ceiling obstructions, floor condition, outlet locations, and air-line access. Treat space figures as planning estimates, not installation specifications.

Select Essential Equipment for Each Type of Work

Choose equipment around the work each bay actually performs. An alignment bay needs a lift that permits safe wheel movement, plus alignment sensors and turn plates. A tire bay needs a tire changer, wheel balancer, and clear space for handling heavy assemblies. For diagnostics, prioritize scan tools, battery testers, and stable power supplies. Not every shop needs every machine.

The U.S. Bureau of Labor Statistics projects 4% employment growth for automotive service technicians and mechanics from 2023 to 2033, with about 67,700 openings each year. Its Occupational Outlook Handbook points to steady demand, but that does not mean every garage should buy more equipment. Match purchases to technician skills, customer demand, and the jobs that regularly return unfinished.

Before selecting a lift, confirm its capacity suits the vehicles you service and have the floor assessed by a qualified professional. Check service access, power needs, calibration, and the cost of maintenance. Small details matter. A machine that blocks a tool cabinet can slow work every day. I would also leave room for one future service; otherwise, a carefully planned shop can become cramped sooner than expected. That trade-off is easy to miss.

Compare Capacity, Safety Features, and Compatibility

How to Choose Garage Equipment in 2026?

Compare Capacity, Safety Features, and Compatibility

Choose equipment for the work you actually do, not the heaviest job you might do someday. Check rated capacity against your vehicle’s weight, including tools or cargo that may remain inside. A small safety margin helps prevent overloading. For a lift, confirm the load rating and lifting-point positions in the vehicle and equipment manuals. Measure ceiling height, bay width, and floor condition before ordering. Tape on the floor makes tight clearances easier to spot.

Safety details deserve close attention. Look for clear locking mechanisms, visible capacity labels, emergency controls, and guards around moving parts. Ask how often inspections and maintenance are recommended, and keep those records. Compatibility is just as practical: verify voltage, plug type, required anchors, hose fittings, and available space. Some equipment looks right online, then arrives with a fitting that does not match. I have seen measurements overlooked; checking twice is less exciting, but cheaper.

Tips: Photograph your garage and measure the intended work area. Compare those details with the installation requirements, not just the product dimensions. Confirm the floor can support the equipment and its load; ask a qualified installer if you are unsure. Keep manuals nearby. Test safety locks without a vehicle before regular use. That step is easy to skip.

Plan for Budget, Installation, and Long-Term Maintenance

How to Choose Garage Equipment in 2026?

Plan beyond the purchase price. A lift may fit your budget but still require floor reinforcement, electrical work, or extra clearance. Measure bay height, door openings, and the distance between posts before ordering. Get installation requirements in writing, then compare the full cost: delivery, setup, staff training, and downtime. S&P Global Mobility reported that the average age of U.S. light vehicles reached 12.6 years in 2024. Older vehicles can mean more varied repair needs, so choose equipment that suits your actual workload—not just the most impressive feature list.

Tips: Keep a maintenance allowance. Check service access, replacement-part availability, inspection schedules, and warranty limits before buying. Record each service date and any unusual vibration or slow lift movement. Small clues matter. A spreadsheet helps, though it cannot predict every repair; leave room for surprises.

For long-term value, ask who will inspect and maintain each system, and how quickly support can reach your shop. Compare expected service intervals and energy use, not only quoted prices. If a supplier cannot explain installation tolerances or routine checks clearly, pause. I would rather delay a purchase than discover that a supposedly ready bay needs costly changes. A detailed checklist may feel fussy. It is cheaper than redoing the floor.

Send your message to us:

WhatsApp Online Chat !